Category Archives: Writing

‘How to join communicative pressure and cooperation in a speaking or writing activity’ by Paolo Torresan

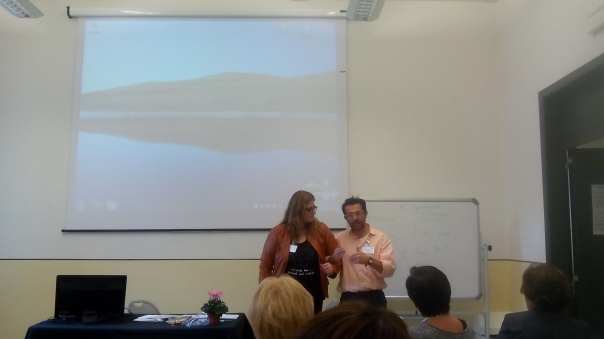
This has got to be the most interactive and fun session I attended at TESOL Italy 2015. It was sponsored by Pilgrims and Paolo mentioned that there will be a course on improvisation in EFL run both in July and in August 2016, at Pilgrims, in Canterbury, by Peter Dyer (more info here).

But back to the workshop. There was no ppt. No lecturing or the audience listening with hidden yawns. Instead, there was a lot of practice, and as the title suggests, communication and cooperation in speaking and writing activities.

I came in slightly late, so missed the instructions to the first activity, but the other teacher I was paired up with explained that we had to improvise and pretend we were giving a gift to each other. One person gives the present, without saying what it is. The person receiving it has to accept it, thank for it, and choose what the gift is, i.e. improvise (Paolo is grateful to Peter Dyer, who developed this activity). Then we swapped roles.

Very simple, but very effective at the same time. The whole room seemed very engaged, and I could see it working very well with real students too. It was fun, involved creativity, a bit of acting, and plenty of opportunity for students to practice some functional language.

After the activity, Paolo explained the basic framework that we would also use in the following demos. The underlying pattern looks like this:

  • Yessing, or accepting your partner’s contribution
  • Adding, adding some info in order to let the action/dialogue take place, and go on, for example:
    • Yes and…
  • Paolo pointed out we should avoid contradicting, i.e. patterns such as ‘Yes, but/however’, because it works as a blocking device, and can lead to ‘conversation paralysis’

So the next demo was called ‘One word at a time’ and was adapted from a book by Keith Johnstone, Impro. Improvisation for the Theatre, published in 1981 by Bloomsbury, London. We were put in pairs with a different teacher and had to imagine we were now one person having an internal dialogue. We can only say one word at a time and we can’t contradict our partner. Paolo demoed the activity with a volunteer:

IMG_20151113_142617


We were then asked to choose a context, and for one reason or another somebody shouted out ‘desert!’, so we ended up having to construct an internal dialogue while being in the middle of a desert… It went kind of like this:

A: We…

B: …are…

A: …looking…

B: …for…

A: …well…

B: …because…

I can’t remember the rest exactly, but it involved finding a gold fish and eating it for dinner – I know, English teachers can have bizarre ideas sometimes.

Again, everyone was very engaged and active. And as with the previous activity, I can see it work really well with students. Lots of room for individual creativity, but at the same time quite demanding linguistically, to be honest. A possible follow up could be to retell the dialogue to a new partner, or even write it down, or record it at home.

The next activity was dynamic storytelling developed by Peter Dyer. One volunteer had to come to the front to start the story by saying a sentence. Again, it was left purely up to us what the context would be, and if I remember right, it was: Once upon a time there was a wolf. Perhaps not terribly imaginative, but it did the trick: starting the story off. The next volunteer would come to the front and say another sentence. But the sentence could be from anywhere in the story: right after the first one, the middle, or the end. The person would stand in a line either close to the first volunteer, or far away, depending on where in the story their sentence would come. And off we went. Again, it was fun, engaging, with lots of language practice. There was a lot of repetition, as you had to remember your sentence and the ones around you to make sure the story would flow. There was definitely plenty of room for peer correction too. As with the previous ones, the creative aspect had us all very much engaged.

In the second part of the workshop we looked at improvisation and creativity for writing activities. Again, they were surprisingly simple, but at the same time very effective and engaging.

Among several that we saw, I will describe the first one, which was group picture activity. It starts with an empty white board. The first volunteer draws the first picture. It can be anything. I think in our case it was a palm tree. The next person adds another picture or element to it, and so on (this activity comes from Sion C., 2000, Creating Conversation in Class, Delta, Peaslake). Once there are quite a few things drawn, Paolo explained that there are several ways in which the pictures could be used as a springboard for writing activities. For example:

  • Write the names of the objects
  • Create a dialogue between the people in the pictures
  • Create an sms (or perhaps in our modern times Whatsapp or FB) chat
  • Write a story connecting the pictures
  • Fill in the empty parts of the board with a story

I imagine this would lend itself nicely to a speaking activity too, either before or instead of the writing phase. I’d imagine the students being quite engaged in the writing, because it’s their story, rather than one imposed by the teacher. A scaffold is developed by the students and for the students, and there is plenty of room for individual creativity.

I would have certainly enjoyed doing these activities in a language class.

My other summaries from TESOL Italy 2015 sessions can be found here:

  1. ELF and TESOL: a change of subject? plenary by Henry Widdowson
  2. Learning to teach listening: students’ and teachers’ perceptions. by Chiara Bruzzano

Meu instantâneo 15 [3677412]Paolo Torresan obtained his PhD in Linguistics and Romance Philology at Ca’ Foscari University, in Venice. He has carried out research at Complutense University, Autonoma University, in Madrid, and at Lancaster University. He has taught at Rio de Janeiro State University and Santa Monica College, Santa Monica, CA. He is Editor-in-chief for the following journals: Officina.it and Bollettino Itals. Among his books we mention: The Multiple Intelligence Theory and Language Teaching (Perugia 2010). He’s also studied improvisation at the Groundlings school, in LA. You can get in touch with Paolo through his profile on academia.edu here.

Teaching writing – product, process or both?

LOGO FINALAll The TEFL Show podcasts can be found in this playlist on Soundcloud and in the iTunes Store here. You can subscribe to the show there, download the podcasts to listen to later and share them on social media.

In this episode we look at different methods and ideas for teaching writing. We discuss the pros and cons of the two main approaches, that is product and process approach. We also look at the importance of writing and ways of encouraging our students to write more.

How do you teach writing? Do your students enjoy it? We’d love to hear from you, so pelase leave us a comment below.

And if you’ve enjoyed this podcast, please rate it in iTunes Store here.

The podcast music theme is under Creative Commons ShareAlike 3.0 International License and was downloaded from this website.

Correcting writing: 8 practical ideas

Correcting students’ writing is something we do on a very regular basis. And the feedback we give depends on many factors. For example, with more creative writing (e.g. compositions, reviews, stories, etc.) we will clearly want to demonstrate our interest in the content, apart from just using our red pen. Depending on the level and the assigned task, we might want to zoom in only on certain mistakes and ignore others (e.g. correct use of past simple). However, whichever method of correcting and marking we choose, learners need to be trained and eased into it step by step. 

Below I’ve listed some of the most popular correction techniques (I use error and mistake interchangeably here):

  1. Using symbols:

    Most teachers use correction codes which can be written either above the mistake or on the margins. They make correcting neater and more organised and might be less intimidating than random comments. They also give the students some guidance how to correct the mistakes, which is crucial if they’re ever going to improve and avoid these mistakes in the future (see point 8 for ideas how to further develop self-correcting skills). Different teachers use different symbols. So I’d love to see yours, especially if you think they might work better than the ones below, which are the ones I use:

    • W = Wrong Word, e.g. It depends of (W) the weather.
    • WF = Word Form, e.g. The film was very bored. (WF)
    • VF = Verb Form, e.g. She play (VF) the piano.
    • SP = Spelling, e.g. My speling (SP) is really bad.
    • P = Punctuation, e.g. However (P) we stayed home.
    • WO = Word Order, e.g. It’s a house beautiful (WO)
    • \?/ = A missing word, e.g. He went to \?/ pub.
  2. Marking criteria:

    You might feel it’s important to establish clear, fair and unambiguous marking criteria, especially if you need the grade as part of the continuous assessment (in many schools I worked for this was the case). They make your marking fairer and much quicker, once you’re in the swing of things. It is also easy for students to see which areas they did well on, and which they need to still improve. Obviously, when you have an exam prep course, you should use the same criteria as used on the exam. In my GE courses I use the same criteria as the one used for IELTS: TA (Task achievement), CC (Cohesion and Coherence) , LR (Lexical Resource) and GRA (Grammatical range and accuracy). Each is graded from 1 to 5 and gives 20 in total. 13 is usually the pass mark, i.e. 3 on our scale. The obvious disadvantage of using marking criteria in GE classes is that you might create a situation in which the students write for the grade, and not for pleasure or self-improvement. Some might also be discouraged if they fail. So if you don’t need to give grades for writing as part of the assessment, you’ll need to weigh up the pros and cons and decide whether using marking criteria would be appropriate for this particular group or individual.

  3. Reformulation: 

    T reformulates/rewrites student’s writing, keeping the main idea but upgrading the language. You should be careful not to go to far beyond the student’s level. S analyses the original and the reformulation, comparing the two, and notices and audits the differences in language, style, cohesion, etc. Then S queries the new language. Apart from aiding acquisition through noticing, it allows the teacher to go beyond word level into sentence and paragraph level (or at least this is the theory). In practice, my main problem with it is that you really need to train students in it to make it work. The whole noticing business can be a very tricky thing for most learners. And frankly, I haven’t really seen it work acquisition miracles. The last obvious disadvantage is that it involves a lot of work on the teacher’s part. But if you haven’t tried it, I recommend you give it a go, especially in a 1-1 setting. What’s your experience been like with reformulation?

  4. Peer correction:

    This can be done as part of the writing process (i.e. after the first draft). Peer correction raises group cohesion, encourages monitoring others and thus helps improve self–monitoring. Students might also be more motivated to respond to peer feedback. To build a positive vibe around peer correction, try first encouraging the students to give only positive comments, slowly easing them into the idea of correcting their partner’s mistakes. To make it more focused, consider using some categories or frames. Harmer (2007) suggests these: My immediate reactions to your writing are…, I like the part…, I’m not sure about…, The specific language errors I’ve noticed are…  

  5. Selective marking:

    As mentioned in the introduction, you might consider zooming in only on certain points (e.g. linking, lexis for reviewing films, etc.). It reduces your work load (YEY!!), decreases the number of mistakes (less intimidating/demotivating for students) and prompts the learners to pay special attention to the parts you will mark them on. You can tell them when you assign a writing that this time you will only focus on a specific language point, which you for example practised in class. Also consider only marking them on the point(s) which were identified as issues in their previous writing.

  6. Responding/commenting:

    We tell the student what we’ve liked and what needs to be improved (the goal). Students might find it more useful and less intimidating than a lot of correction symbols in red all over their work. It is especially useful if the student is going to do a rewrite. I usually write at least 3 positive and 3 negative comments below their work. I also try to react to the content of their work whenever possible, so that the student knows I appreciate their effort and care about what they wrote.

  7. Using colours:

    I tend to use green and red. With green I tick or underline the parts which are correct, particularly impressive or simply interesting. For example, you might underline correctly used linkers, which students were asked to use in their writing. Or some nice collocations or vocabulary items. Or the parts that are really well written, have interesting content, etc. This shows the student you appreciate their effort and also tells the student that there are many positive things about their work. The red is for mistakes. I use the same colours when giving comments, i.e. green for positive ones, and red for ‘to improve’. I know some teachers also use yellow/orange for mistakes (i.e. slips) and red for errors (i.e. things the student doesn’t know).

  8. Scaffolding self-correction:

    Ideally, we’d like our students to spot and correct the mistakes themselves. But this takes time and scaffolding. I usually first start with the symbols above the errors. This gives students quite a lot of guidance, as they know which word is wrong and what’s wrong with it, i.e. that the verb is in the incorrect form. Once they get better and are able to correct, I underline the mistakes, but write the symbols on the margin next to the line rather than above the words. The next step is to remove the symbols all together and only underline errors. Then, you only indicate which lines contain errors, and perhaps how many there are. Finally, you can ask your students to find, for example 5 grammar mistakes and X number of misspelled words, etc. Of course, you don’t always need to follow all the steps with all students. You’ll see how quickly they’re getting better at correcting and limit scaffolding accordingly. To improve students’ proofreading skills you might also consider using some of the 10 proofreading tips I wrote about previously.

    If you use any other correction techniques, please comment below. I’d love to hear your ideas.

    In one of the future posts I’m going to write about different activities which can be used in class deal with the mistakes students made in their writing.

    For now, you might find these books useful:

    • The Practice of English Language Teaching, Jeremy Harmer, Longman 2007 (Chapter 8) 
    • Writing, Tricia Hedge, OUP 2003
    • How to Teach Writing, Jeremy Harmer, Pearson 2004

10 proofreading tips

Recently I’ve been teaching quite a lot of Academic Writing and exam preparation, and something which will perhaps sound obvious when I say it – or perhaps not – has become apparent. Namely, proofreading your own work can be really challenging.

If it’s been a while since you wrote something other than a few informal emails, FB and text messages, you might have forgotten how difficult proofreading can actually be. As a teacher, spotting your students mistakes is a piece of cake. But spotting your own…

And if we put ourselves in the position of a student who’s still grappling with the grammar, spelling and punctuation (apart from trying to make their writing coherent and use all the damn linkers their teacher insists on), the challenge becomes even greater.

There are numerous correction techniques we can use as teachers to give our students feedback on their writing, and I’m hoping to blog about them quite soon. What I want to explore here, however, is how to help our learners to avoid making the mistake in the first place through improving their proofreading skills – something which has never really occurred to me before and which I think is rather neglected in teaching writing.

For example, as a language student – both at university and in language schools – I’ve never really been taught how to check my work for mistakes. But told to do so anyway by the teacher. So as most of us, I’ve picked it up as I went along, through trial and error. And as a teacher, I’ve also never really taught my students how to proofread their writing before handing it in although I’ve always expected them to do it.

So here’s a not-altogether-exhaustive list of 10 proofreading tips. I’m planning to go through with some of my students to see if it helps improve their quality of writing. I’ve also tried to apply them to this post, but do let me know if you spot any mistakes.


  1.  Take a break:

    If you’ve been toiling over your written assignment for quite some time now, you’ve probably become so familiar with it that you won’t be able to spot any mistakes. Your ideas will sound crystal clear and perfectly logical. But probably you will be seeing what you think you wrote rather than what’s actually on paper. So setting the text aside can help you clear your mind and see it anew when you get back to it. Ideally, sleep on it. If you’re in a rush, relax for as long as you can, before proofreading. Try closing your eyes for 5 minutes and clearing your mind. Or gaze through the window and think about something else.

  2. Print it:

    I’m not sure why, but it’s much more difficult to proofread on the screen. Perhaps because if you’ve been writing the text on your computer, your eyes are probably already quite tired. Printing it might also help you see your writing from a different angle. A fresh perspective. Try it. It definitely works.

  3. One thing at a time:

    Remember – it’s not a sprint (although in an exam situation you might be pressed for time). Divide the process of proofreading into several stages. This will enable you to focus on a particular aspect (e.g. punctuation; subject/verb agreement) more closely and increase your chances of spotting the mistakes. Also, shifting your focus should help you stay concentrated and fresh for longer, as you will be looking at different and new aspects of your writing at each proofreading stage.

  4. Check the flow:

    Before you start looking at language mistakes, read the text for the overall meaning. Check if it’s logical. Try to put yourself in the shoes of somebody who knows little or nothing about the topic. The best texts are the least convoluted ones. If you’re writing an argumentative essay, play the devil’s advocate to see if you’ve used solid and convincing argumentation.

  5. Typical mistakes first:

    Prepare a list of the most typical and recurring mistakes that you’ve made in your recent assignments. Alternatively, ask your teacher  for help. Don’t go for too many. Select maybe 5 that are the most persistent. Have this list in front of you and focus first only on the mistakes listed there. They can be quite difficult to spot, because you might have made them so many times that they seem correct to your brain. So read the text carefully. Once you’re happy the typical mistakes are out, proofread again for other errors.

  6. Read it backwards:

    I’m not joking. Try it. Reading it word by word from back to front will shift your attention from the content to the text itself. This should help you spot some spelling, punctuation and grammar mistakes which have so far been overlooked.

  7. Read it aloud:

    And backwards! No, this time I’m only joking about the last one. But reading aloud can actually be very helpful. You might be able to hear the mistakes you were not able to see. This technique is particularly effective for spotting punctuation errors, run-on sentences and some word endings (e.g. -s).

  8. Don’t rely on grammar and spelling checkers:

    Of course, Word spell-checker for example, can be very helpful. But they also make you lazy. And many mistakes are overlooked by them. For example, “to” and “too” are both perfectly good words, so the error in “I like reading to” will not be underlined. Neither will “His advise was really helpful”. Sometimes a correctly spelled word might be underlined because it’s not found in the spell checker’s dictionary. In short, grammar and spelling checkers are quite smart, but only as far as it goes. So do use them, but don’t treat them as the ultimate solution. You will still need to proofread.

  9. The devil’s in the details:

    Double-check all the figures, proper names and references. Often one zero missing in a figure can cause a whole lot of problems. Make sure the information given in your text is accurate. Watch out for commonly misused words.

  10. Ask for help:

    If all else fails, ask somebody else to proofread your text (for example, in exchange for one of their texts). It doesn’t necessarily mean you have to pay somebody to proofread your work. Even just a quick look by a friend, relative or colleague can often make the difference. They’ll be looking at your work with a fresh pair of eyes and are much more likely to spot the mistakes that have escaped you. If you know you have problems with a particular area (e.g spelling), ask your proofreader to focus on it. This should make it more effective and time-efficient.

I hope you can use these 10 tips to improve the quality of your work before your teacher or tutor gets there with a red pen. And as a teacher, you can use these to develop your students’ proofreading skills.

If you have any other tips or proofreading techniques that work for you, leave a comment below.

When composing my list, I used these sites: