Tag Archives: Error correction

Controlled oral practice in ELT – what happened to drilling?

[This article was originally published as What happened to drilling? in the BELTA Bulletin in October 2014. It’s available on-line for BELTA members here. It’s reprinted here with the permission of the editor.]

As communicative language teachers we are told that drilling is bad. We’re told it is pointless, uncommunicative and deprived of any meaning. It also makes our classes teacher–centred.

Before you jump on the bandwagon and continue the rant, I’d like you to pause for a moment and ask yourself whether drilling really has to be so horribly boring and uncommunicative as we are repeatedly told. I hope to show you with this article that, no – drilling doesn’t have to be boring. It can actually be fun, meaningful, effective and rewarding for the students.

In this article I’m going to first look at eight common criticisms of drilling and controlled oral practice (COP) and show why they are not all together accurate. Then I’ll describe a couple of COP activities which you can use in class, and offer some final tips on using COP.

Let’s then look at the criticisms.

  1. Criticism: Too much emphasis put on accuracy, hindering the development of real communication skills. Rebuttal: It is true that these exercises focus on accuracy. CLT does not. And this is why a little bit of COP can do your students a lot of good. By no means should COP become the main focus of all your lessons. It’s only part of the diet, like broccoli. And even though we might not like the taste, we still eat it every now and then, because we know it’s good for us. The same rule applies to COP.
  2. Criticism: Only useful when practising language students have just encountered. Rebuttal: Usually COP is seen as a prelude to the real icing on the cake, that is, the free speaking activity. But why not use it as a quick revision to address fossilised errors, or give students quick extra practice in something they are struggling with?
  3. Criticism: COP is only applicable and valid when teaching lower levels. Rebuttal: Why should that be? COP can and should be used at any level. It helps students automatise the language they might already know but still struggle to use confidently and naturally, or eradicate fossilised errors.
  4. Criticism: COP does not promote learner autonomy and is teacher–centred. Rebuttal: That would be true if your class were to consist entirely of COP. If done judiciously, it is actually empowering since students will get more comfortable with the language, and are more likely to use it later on in more communicative activities. And it does not need to be teacher–centred. Put them in pairs. Put one student in charge of the drill. There are a number of options which allow you to disappear.
  5. Criticism: Usually only word or sentence–based, decontextualised and very restrictive. Rebuttal: Whenever possible, use real–life situations. Set the context and make it meaningful. Try to implement natural features of the spoken discourse into your drill. Use drills which allow for more than one answer, and which are more flexible.
  6. Criticism: It goes against some styles of teaching, especially the role of the teacher as a facilitator. Rebuttal: Give it a go. Once you and your students get comfortable with it, COP can become an important part of your facilitative approach. Just don’t overdo it. Too much of anything is never good. But if done correctly, COP can be really enjoyable for the students. It can also nicely change the focus and pace of the class.
  7. Criticism: Being able to repeat in a parrot like fashion does not mean the student will remember or be able to use the language in real conversation. Rebuttal: That might be true. But then if they don’t repeat the language a few times in a safe and controlled environment, will they be more or less likely to use it in a real conversation? Probably less. Plus, what they are trying to memorise and automatise, are not the examples they are drilling, but the language patterns embedded in them. COP can also help with avoidance.
  8. Criticism: The course book writers ignore it, and so should I! Rebuttal: Since the advent of CLT, drilling has been heavily put down, and course book writers responded by ignoring COP in their materials. It’s like switching from only eating meat to being a vegan.

Having dealt with some of the most common criticisms, let’s look at examples of COP.

Photo by Rob! under Creative Commons from: http://www.doshort.com/4POr

Substitution Drills:

This is probably the COP I’ve used most often myself, as it’s readily applicable for almost any language point. The basic idea is that the learners repeat the modelled grammar using the new information given, e.g. “I’ve been reading for two hours”.

T: midday

S: I’ve been reading since midday.

T: she

S: She’s been reading for two hours.

Make sure the examples lead to meaningful and probable sentences. Once you and your students get comfortable with this drill, consider some of the below variations, which aim to increase the cognitive difficulty and make the COP more natural and meaningful.

Multiple Substitution Drills:

Instead of substituting one item, students substitute two. So with the example from above:

T: he/drinking

S: He’s been drinking since midday.

Progressive Drills:

The difference between this one and the classic substitution drill is that you don’t come back to the original sentence, but continue from the last. If you do it as a whole class, it causes other students to listen carefully to what the previous student has said as they’ll have to pick up from there.

T: play football

S1: He’s been playing football since midday.

T: two hours

S2: He’s been playing football for two hours.

Open ended Drills:

Students repeat the modelled language, or finish a sentence, making it logical or true for themselves. The idea is they have to manipulate not only the grammar, but more importantly fill in the content in a very short time, which cognitively is of course much more challenging then a classic substitution drill. At the same time, it is arguably more natural. For example, to practice “in order to/so that” for purpose:

T: Why do birds have wings?

S: In order to fly./So that they can fly (or anything else that makes sense)

True/False drills:

Students manipulate the content of the sentence to make it true or false for them. They are more challenging cognitively and require the learners to process the language at a slightly deeper level. They are also more meaningful than classic substitution drills. For example, to practice “used to”

T: play football

S1: I used to play football as a child

S2 I didn’t use to play football as a child.

Mumble/Silent drills:

The teacher models the TL and the students repeat it quietly. It’s less intimidating then doing it out loud, and the students can be told to repeat the same phrase a few times under their breath, which gives them more practice and increases their confidence (I also assign it to my students as a ongoing HW, i.e. speak to yourself quietly or in your mind and repeat the language you have problems with.

Back–chaining:

A sentence is built from the end by adding short (between eight and ten syllables), natural chunks of language. Each chunk is modelled by the teacher and repeated by the students.

  1. the test
  2. for the test
  3. for the test
  4. should have
  5. should have studied
  6. I should have studied
  7. I should have studied for the test.

As Chris Ozog suggests in his article (see references below), we should focus on natural chunks of language, i.e. it would have been odd to drill have studied as a chunk. He also points out that back-chaining “also serves to promote noticing of features of connected speech” and “may help the students recognise fluently delivered English better”.

Jazz Chants:

They involve repetition of short, multi-word phrases at a consistent rhythm. They were popularised by Carolyn Graham, and here you can see video of her demonstrating how to create your own jazz chant.

Photo under Creative Commons from: http://usa.streetsblog.org/2008/07/22/cartoon-tuesday-drilling-deeper/

To sum up, any good COP should fulfil one or all of the below aims:

    • to establish new habits and minimise or get rid of the bad ones, some of which might be deeply ingrained (e.g. fossilisation, avoidance)
    • boost learners confidence with language by practising it at reasonably natural speed
    • to increase spontaneity, i.e. to facilitate making the quantum leap from having to think about it very hard, to simply saying it correctly without thinking (Wilson, M.)

You might consider making these aims clear to your class. Students often want to know why they are doing what they are doing. And if they understand that the purpose of the activity is to improve their speaking, they are much more likely to give it a go, despite some initial reluctance.

Read up and continue drilling:

Aspects of contemporary English – TESOL Italy 2015 talk by Jon Hird


IMG_20151114_133837This is the fourth of the series of posts on the talks I attended at TESOL Italy 2015. You can read the previous ones here:
  1. ELF and TESOL: a change of subject? plenary by Henry Widdowson
  2. Learning to teach listening: students’ and teachers’ perceptions. by Chiara Bruzzano
  3. ‘How to join communicative pressure and cooperation in a speaking or writing activity’ by Paolo Torresan

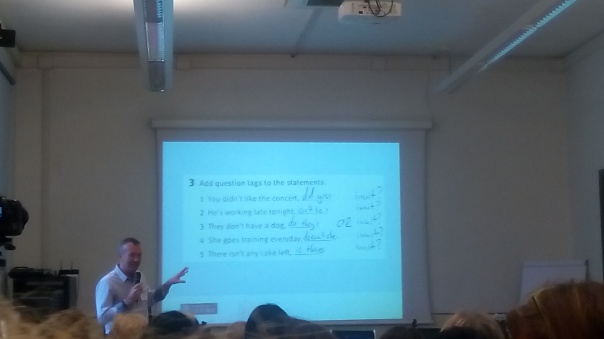
The session started with prompts for questions from which we had to formulate correct questions to ask our partner. Afterwards, we had to try to remember the information we heard, and check with our partner it was right by asking tag questions. This can be seen below:

IMG_20151114_135732

But why bother with the complexities of the ‘correct’ question tags, if we can simply use ‘innit?’ in all cases. Or can we?

Of course, many would argue that ‘innit’ as a question tag is uneducated, uncultivated, vulgar and – worst of all – ungrammatical! But is it? Jon Hird’s talk aimed to question the prescriptive attitude to the language, and through vivid and hilarious examples of language (mis)use show that any language, especially one as extensively used as English, is a living thing which never stops evolving and changing.

However, attempts to dictate and prescribe what is ‘correct’ English are by no means new. Already a few hundred years ago Jonathan Swift was convinced that attempts must be made in order to ‘ascertain’ and ‘fix’ the English language forever. A very often used argument to support this is that otherwise the language will inevitably decay, and that ‘vulgar’ forms will become the norm, while the ‘cultivated’ and ‘correct’ ones will be forced into oblivion (you can read my post about what is ‘correct’ English here, and a listening lesson plan on a similar theme here).

Despite such claims, there is of course no evidence that this might have happened in the past or might occur at any time in the future. Interestingly, as far as English is concerned, there are only a few dozen grammar features that are considered non-standard. So in the next part of the talk, we look at some examples of non-standard English.

The first example is by Jagger: “Come off of it”.

The second one is now spreading very rapidly (as a grammar plague?), not just in English, but also in other languages (it’s definitely the case in Polish and Spanish, and a teacher sat next to me said that Swedish was one of the victims of this grammar ‘vulgarism’ too). So, many English speakers now use less both with countable and uncountable nouns. It has become so common that we hardly notice it any more, unless a grammar pundit points it out. This results in famous companies making grammar ‘mistakes’ in their ads. For example, British Airways might tell you that there are “less than 10 seats left”. If you’re thinking of grabbing a quick coffee, go for Starbucks, because they are a green company, and as they put it: “Less napkins. More plants. More planet”. Can’t argue with that.

Next comes the example of the infamous tag question we already saw at the very beginning, innit? The tag is so widespread, that it’s well bad, innit? It was wicked, innit? He’s not coming, innit? And so on. Just stop by and listen to how people speak. There’s no more room for the ‘correct’ question tags. They’re too cumbersome. Too long. Too varied. Innit?

Another example of non-standard English is teenspeak. One of the examples that entered ‘adultspeak’ and became quite widespread and popular a few years ago was chillax. What a brilliant word! I remember hearing it for the first time, and it was almost a revelation. Now you could chill and relax at the same time. And you had a word that described it! Well bad, innit? Unfortunately for the teens, as soon as they found out the word was spreading among adults, they had to drop it. It wasn’t wicked any more.

But if we had to choose a word in English that was by far the most widely spread and used more frequently, it would have to be ‘like’. Jon shows us a transcript of his teenage son speaking which very clearly illustrates that ‘like’ is everywhere now:

IMG_20151114_140803

One more example Jon gives is LOL. First used on the Internet, it’s now started an exciting and adventurous linguistic life of its own. In short, it’s gone completely out of control. So now you can say: lol at you! Lols! That’s so lols!

I literally lolled when I saw these examples.

For some, this is a clear indication that language is going to the dogs. And if this decay is to be prevented and reversed strict measures need to be taken. For example, banning certain words from use:

IMG_20151114_140057

One aspect of English that tends to drive some grammar pundits up the wall is the uncanny ability of the English language and its speakers to turn any word into a verb. Even LOL is now a verb. Anything can be a verb. As Humpty Dumpty put it, the only question is, who is to be the master. And verbing, as it’s sometimes called (yes, apparently ‘verb’ is a verb too), has been going on for centuries. According to Pinker, “It’s what makes English English”.

But of course, certain people don’t like the way in which this process ‘impacts’ the English language. For example, BBC went as far as banning the use of ‘impact’ as a verb. We can only see how this might ‘impact’ the English used by BBC reporters, but looking back at the history of English, ‘impact’ as a verb is there to stay.

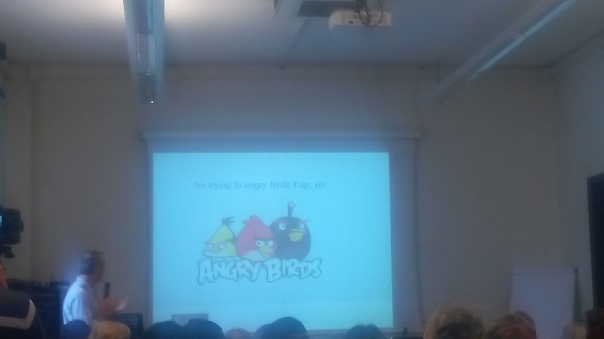
There are many other more interesting examples of verbing words in English, though. For example, if you’re on Twitter, you can ‘favourite’ others’ tweets. No one questions that now you ‘google’ things. However, you might want to ‘wikipedia’ it too. And if you’re playing Angry Birds, well, you can angrybirds it up, yo!

IMG_20151114_142237

So, did you have a good time conferencing? I certainly did. And Jon’s talk was well bad, innit?

PS The issue English teachers are faced with is whether any of the above uses of language should be taught in class. They’re incredibly widespread, and students – especially the ones studying in an English-speaking country, or watching a lot of TV and films in English – are bound to come across them sooner or later. Would you teach ‘innit’, ‘like’ or verbing to your students? Why (not)? Let me know what you think in the comments section.

To praise or not to praise – that is the question

This week I’ve read two fascinating posts on giving praise to our students. The first was a guest post from Tereza which appeared on Sandy Millin’s blog. You can read it here. In a nutshell, the author questions the benefit of giving praise, especially in excess. Originally from the Czech Republic, Tereza’s now living in the US and she’s been puzzled by the amount of excessively positive feedback she’s got from her teacher who was “super impressed” with anything she did. It would seem she was an incredibly talented genius – at least if she was to believe all the feedback.

Tereza then goes on to argue that too much praise can be counter-productive. She writes:

“I have already lost the sense of what is meant honestly […]. I basically have no measure whether I did well or bad because I always get a perfect evaluation. You have no idea whether people like you or how high they think of you because they always say you did a fantastic job. At the beginning, it makes you feel good, like you are really special, you do really so well. But with time, you get tired of that because you already see through it”.

On the other hand, the second post by Lawrence Hilton, which can be read here, praises praise, even if it’s to be excessive. With a beautiful analogy to desert flowers, Lawrence argues that positive feedback is like rain – it can turn a desolate, sandy landscape of a desert into a beautiful see of blossoming flowers. He would rather err by giving too much rather than to little praise to his students. After all:

“If they are not going to get praise and encouragement from the teacher at every step along the way, from where are they going to receive it?”

I was taken by both articles, because they persuasively argue their points. They were also very thought-provoking and they led me to reflect on my own teaching practice a bit.

I think both Tereza and Lawrence are right. Giving feedback is much more complicated than we might initially think, and there are good lessons to be learned from both articles.

It is definitely true that giving too much praise can be counter-productive. Students will very quickly see through it. They know they didn’t put much effort into their homework, but the teacher still was “super impressed”. This can lead to one of two things:

  1. I don’t need to work hard to get good grades/positive feedback, so why bother making more effort?
  2. Maybe my teacher is right and I’m simply the best, so why bother making more effort?

In both cases, the result is a rather negative one. Other students will also probably realise that all are getting super positive feedback, despite varying quality of their work. It can’t be motivating for a very strong student if the teacher is equally super impressed with their work, as with that of a very weak student.

As Lawrence, points out, though, if we don’t praise our students, who is going to? We do need to encourage them:

“Foreign language students have to overcome their own feelings of insecurity, lack of confidence, feelings of shyness and fear of making mistakes. […] A teacher has to instil the confidence and how can one do that without complimenting and praising the efforts that we are witness to in class?”

I agree with Lawrence that there are times when excessive praise (if given sparingly and judiciously, though) can work miracles. Sometimes you meet students who are terribly shy, lacking in confidence and their own abilities to the point of  “I will never succeed” attitude. As a teacher, we need to encourage them to become more (but not too) self-confident. And a good way of doing it is by giving them slightly more positive feedback than they deserve.

However, we need to stop somewhere. We can’t continue praising if there’s nothing to praise for. But when and how?

In my opinion, we should be honest with our learners. We need to give praise when praise is due, but moderate it according to the student’s performance. Students need to know what they did right, and what went wrong. Otherwise, if they only hear positive feedback, they won’t know what to do to improve and do better next time. And if whatever our students do is fantastic and brilliant, we will be in a serious need of inventing even “more impressive” adjectives to praise them.

I also believe that the majority of students are far more robust than we think. Telling them they’re wrong, or that they’ve made a mistake, is unlikely to cause tears or depression. Of course, the under-confident ones should be spotted and encouraged with highlighting positive feedback first. But if a student fails to do a task or make a mistake, we do need to tell them. How we do it, is a different kettle of fish and a good subject for a new post (here you can read my post on correcting students’ writing). It goes without saying, though, that students expect us to point out their errors and help them improve.

An important consideration is also to respond to the content, rather than just the language. All too often, we focus on correcting errors and fail to notice the story the student has just shared with us. take a look at an example of feedback I recently gave to my 1-1 IELTS student on a recording he sent me. The student has struggled with fluency, is quite daunted by the speaking part and lacks a bit in confidence. We’ve been having classes for 3 weeks, twice a week 90mins:

“A very good effort, Ery! I used to do a lot of swimming myself. Really good exercise 🙂 I might get back to it some time soon.
You structured your speech very well. You used good fillers to avoid pauses. You used some more complex sentences and there were a lot of error-free sentences. A good summary at the end as well. Keep up the good work and do more speaking, please. You’ve been improving, and it would be great if you could send me a recording like this at least every 2 or 3 days (it can even be more spontaneous if you don’t have time to rehearse.
Some suggestions:

  • at the end of sentences the intonation should go down/fall to indicate the sentence is finished
  • try to use substitution to avoid repeating go swimming or swimming so often, i.e. I do it/this sport/activity, I practise it/this sport

BTW, we say go swimming, not *go for swimming. Really looking forward to more recordings from you!”

I avoided using any extreme adjectives such as: fantastic or incredible, because his speaking was far from it. I commented on the content to let him know I actually listen to WHAT he says, not just how. There’s quite a lot of positive feedback, because he needs to know what he already does well. Otherwise, he might fall back into his bad habits.

On the other hand, I included some suggestions. I didn’t use the word error or mistake, because they have a negative overtone, while “suggestions” or “to improve” are neutral. But I think it would be wrong to overlook the errors and say: I was super impressed. You’re really fluent. You’re English is fantastic; because this is simply not true, and both me and the student know it.

To sum up, the key is a balanced feedback. Praise should be given when it’s due. And it should be adjusted to the student’s performance. We can’t be super impressed with everything all the time. It’s just not fair to the student in question, and to others who might be much better. And we definitely need to let the students know how they can improve and what the mistakes are. Otherwise we risk creating over-confident learners whose English is too impressive to continue working on it.

Correcting writing: 8 practical ideas

Correcting students’ writing is something we do on a very regular basis. And the feedback we give depends on many factors. For example, with more creative writing (e.g. compositions, reviews, stories, etc.) we will clearly want to demonstrate our interest in the content, apart from just using our red pen. Depending on the level and the assigned task, we might want to zoom in only on certain mistakes and ignore others (e.g. correct use of past simple). However, whichever method of correcting and marking we choose, learners need to be trained and eased into it step by step. 

Below I’ve listed some of the most popular correction techniques (I use error and mistake interchangeably here):

  1. Using symbols:

    Most teachers use correction codes which can be written either above the mistake or on the margins. They make correcting neater and more organised and might be less intimidating than random comments. They also give the students some guidance how to correct the mistakes, which is crucial if they’re ever going to improve and avoid these mistakes in the future (see point 8 for ideas how to further develop self-correcting skills). Different teachers use different symbols. So I’d love to see yours, especially if you think they might work better than the ones below, which are the ones I use:

    • W = Wrong Word, e.g. It depends of (W) the weather.
    • WF = Word Form, e.g. The film was very bored. (WF)
    • VF = Verb Form, e.g. She play (VF) the piano.
    • SP = Spelling, e.g. My speling (SP) is really bad.
    • P = Punctuation, e.g. However (P) we stayed home.
    • WO = Word Order, e.g. It’s a house beautiful (WO)
    • \?/ = A missing word, e.g. He went to \?/ pub.
  2. Marking criteria:

    You might feel it’s important to establish clear, fair and unambiguous marking criteria, especially if you need the grade as part of the continuous assessment (in many schools I worked for this was the case). They make your marking fairer and much quicker, once you’re in the swing of things. It is also easy for students to see which areas they did well on, and which they need to still improve. Obviously, when you have an exam prep course, you should use the same criteria as used on the exam. In my GE courses I use the same criteria as the one used for IELTS: TA (Task achievement), CC (Cohesion and Coherence) , LR (Lexical Resource) and GRA (Grammatical range and accuracy). Each is graded from 1 to 5 and gives 20 in total. 13 is usually the pass mark, i.e. 3 on our scale. The obvious disadvantage of using marking criteria in GE classes is that you might create a situation in which the students write for the grade, and not for pleasure or self-improvement. Some might also be discouraged if they fail. So if you don’t need to give grades for writing as part of the assessment, you’ll need to weigh up the pros and cons and decide whether using marking criteria would be appropriate for this particular group or individual.

  3. Reformulation: 

    T reformulates/rewrites student’s writing, keeping the main idea but upgrading the language. You should be careful not to go to far beyond the student’s level. S analyses the original and the reformulation, comparing the two, and notices and audits the differences in language, style, cohesion, etc. Then S queries the new language. Apart from aiding acquisition through noticing, it allows the teacher to go beyond word level into sentence and paragraph level (or at least this is the theory). In practice, my main problem with it is that you really need to train students in it to make it work. The whole noticing business can be a very tricky thing for most learners. And frankly, I haven’t really seen it work acquisition miracles. The last obvious disadvantage is that it involves a lot of work on the teacher’s part. But if you haven’t tried it, I recommend you give it a go, especially in a 1-1 setting. What’s your experience been like with reformulation?

  4. Peer correction:

    This can be done as part of the writing process (i.e. after the first draft). Peer correction raises group cohesion, encourages monitoring others and thus helps improve self–monitoring. Students might also be more motivated to respond to peer feedback. To build a positive vibe around peer correction, try first encouraging the students to give only positive comments, slowly easing them into the idea of correcting their partner’s mistakes. To make it more focused, consider using some categories or frames. Harmer (2007) suggests these: My immediate reactions to your writing are…, I like the part…, I’m not sure about…, The specific language errors I’ve noticed are…  

  5. Selective marking:

    As mentioned in the introduction, you might consider zooming in only on certain points (e.g. linking, lexis for reviewing films, etc.). It reduces your work load (YEY!!), decreases the number of mistakes (less intimidating/demotivating for students) and prompts the learners to pay special attention to the parts you will mark them on. You can tell them when you assign a writing that this time you will only focus on a specific language point, which you for example practised in class. Also consider only marking them on the point(s) which were identified as issues in their previous writing.

  6. Responding/commenting:

    We tell the student what we’ve liked and what needs to be improved (the goal). Students might find it more useful and less intimidating than a lot of correction symbols in red all over their work. It is especially useful if the student is going to do a rewrite. I usually write at least 3 positive and 3 negative comments below their work. I also try to react to the content of their work whenever possible, so that the student knows I appreciate their effort and care about what they wrote.

  7. Using colours:

    I tend to use green and red. With green I tick or underline the parts which are correct, particularly impressive or simply interesting. For example, you might underline correctly used linkers, which students were asked to use in their writing. Or some nice collocations or vocabulary items. Or the parts that are really well written, have interesting content, etc. This shows the student you appreciate their effort and also tells the student that there are many positive things about their work. The red is for mistakes. I use the same colours when giving comments, i.e. green for positive ones, and red for ‘to improve’. I know some teachers also use yellow/orange for mistakes (i.e. slips) and red for errors (i.e. things the student doesn’t know).

  8. Scaffolding self-correction:

    Ideally, we’d like our students to spot and correct the mistakes themselves. But this takes time and scaffolding. I usually first start with the symbols above the errors. This gives students quite a lot of guidance, as they know which word is wrong and what’s wrong with it, i.e. that the verb is in the incorrect form. Once they get better and are able to correct, I underline the mistakes, but write the symbols on the margin next to the line rather than above the words. The next step is to remove the symbols all together and only underline errors. Then, you only indicate which lines contain errors, and perhaps how many there are. Finally, you can ask your students to find, for example 5 grammar mistakes and X number of misspelled words, etc. Of course, you don’t always need to follow all the steps with all students. You’ll see how quickly they’re getting better at correcting and limit scaffolding accordingly. To improve students’ proofreading skills you might also consider using some of the 10 proofreading tips I wrote about previously.

    If you use any other correction techniques, please comment below. I’d love to hear your ideas.

    In one of the future posts I’m going to write about different activities which can be used in class deal with the mistakes students made in their writing.

    For now, you might find these books useful:

    • The Practice of English Language Teaching, Jeremy Harmer, Longman 2007 (Chapter 8) 
    • Writing, Tricia Hedge, OUP 2003
    • How to Teach Writing, Jeremy Harmer, Pearson 2004

10 proofreading tips

Recently I’ve been teaching quite a lot of Academic Writing and exam preparation, and something which will perhaps sound obvious when I say it – or perhaps not – has become apparent. Namely, proofreading your own work can be really challenging.

If it’s been a while since you wrote something other than a few informal emails, FB and text messages, you might have forgotten how difficult proofreading can actually be. As a teacher, spotting your students mistakes is a piece of cake. But spotting your own…

And if we put ourselves in the position of a student who’s still grappling with the grammar, spelling and punctuation (apart from trying to make their writing coherent and use all the damn linkers their teacher insists on), the challenge becomes even greater.

There are numerous correction techniques we can use as teachers to give our students feedback on their writing, and I’m hoping to blog about them quite soon. What I want to explore here, however, is how to help our learners to avoid making the mistake in the first place through improving their proofreading skills – something which has never really occurred to me before and which I think is rather neglected in teaching writing.

For example, as a language student – both at university and in language schools – I’ve never really been taught how to check my work for mistakes. But told to do so anyway by the teacher. So as most of us, I’ve picked it up as I went along, through trial and error. And as a teacher, I’ve also never really taught my students how to proofread their writing before handing it in although I’ve always expected them to do it.

So here’s a not-altogether-exhaustive list of 10 proofreading tips. I’m planning to go through with some of my students to see if it helps improve their quality of writing. I’ve also tried to apply them to this post, but do let me know if you spot any mistakes.


  1.  Take a break:

    If you’ve been toiling over your written assignment for quite some time now, you’ve probably become so familiar with it that you won’t be able to spot any mistakes. Your ideas will sound crystal clear and perfectly logical. But probably you will be seeing what you think you wrote rather than what’s actually on paper. So setting the text aside can help you clear your mind and see it anew when you get back to it. Ideally, sleep on it. If you’re in a rush, relax for as long as you can, before proofreading. Try closing your eyes for 5 minutes and clearing your mind. Or gaze through the window and think about something else.

  2. Print it:

    I’m not sure why, but it’s much more difficult to proofread on the screen. Perhaps because if you’ve been writing the text on your computer, your eyes are probably already quite tired. Printing it might also help you see your writing from a different angle. A fresh perspective. Try it. It definitely works.

  3. One thing at a time:

    Remember – it’s not a sprint (although in an exam situation you might be pressed for time). Divide the process of proofreading into several stages. This will enable you to focus on a particular aspect (e.g. punctuation; subject/verb agreement) more closely and increase your chances of spotting the mistakes. Also, shifting your focus should help you stay concentrated and fresh for longer, as you will be looking at different and new aspects of your writing at each proofreading stage.

  4. Check the flow:

    Before you start looking at language mistakes, read the text for the overall meaning. Check if it’s logical. Try to put yourself in the shoes of somebody who knows little or nothing about the topic. The best texts are the least convoluted ones. If you’re writing an argumentative essay, play the devil’s advocate to see if you’ve used solid and convincing argumentation.

  5. Typical mistakes first:

    Prepare a list of the most typical and recurring mistakes that you’ve made in your recent assignments. Alternatively, ask your teacher  for help. Don’t go for too many. Select maybe 5 that are the most persistent. Have this list in front of you and focus first only on the mistakes listed there. They can be quite difficult to spot, because you might have made them so many times that they seem correct to your brain. So read the text carefully. Once you’re happy the typical mistakes are out, proofread again for other errors.

  6. Read it backwards:

    I’m not joking. Try it. Reading it word by word from back to front will shift your attention from the content to the text itself. This should help you spot some spelling, punctuation and grammar mistakes which have so far been overlooked.

  7. Read it aloud:

    And backwards! No, this time I’m only joking about the last one. But reading aloud can actually be very helpful. You might be able to hear the mistakes you were not able to see. This technique is particularly effective for spotting punctuation errors, run-on sentences and some word endings (e.g. -s).

  8. Don’t rely on grammar and spelling checkers:

    Of course, Word spell-checker for example, can be very helpful. But they also make you lazy. And many mistakes are overlooked by them. For example, “to” and “too” are both perfectly good words, so the error in “I like reading to” will not be underlined. Neither will “His advise was really helpful”. Sometimes a correctly spelled word might be underlined because it’s not found in the spell checker’s dictionary. In short, grammar and spelling checkers are quite smart, but only as far as it goes. So do use them, but don’t treat them as the ultimate solution. You will still need to proofread.

  9. The devil’s in the details:

    Double-check all the figures, proper names and references. Often one zero missing in a figure can cause a whole lot of problems. Make sure the information given in your text is accurate. Watch out for commonly misused words.

  10. Ask for help:

    If all else fails, ask somebody else to proofread your text (for example, in exchange for one of their texts). It doesn’t necessarily mean you have to pay somebody to proofread your work. Even just a quick look by a friend, relative or colleague can often make the difference. They’ll be looking at your work with a fresh pair of eyes and are much more likely to spot the mistakes that have escaped you. If you know you have problems with a particular area (e.g spelling), ask your proofreader to focus on it. This should make it more effective and time-efficient.

I hope you can use these 10 tips to improve the quality of your work before your teacher or tutor gets there with a red pen. And as a teacher, you can use these to develop your students’ proofreading skills.

If you have any other tips or proofreading techniques that work for you, leave a comment below.

When composing my list, I used these sites: